Kamis, 16 November 2017

Regulator Apeks XTX40, Regulator Keren untuk Daerah Tropis

Regulator Apeks XTX40, Regulator Keren untuk Daerah Tropis


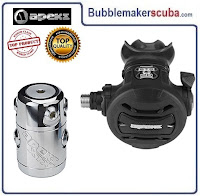
 Regulator Apeks XTX40    Regulator Apeks XTX40


The first stage has four medium-pressure ports all mounted on a rotating turret. This results in optimal hose routing while eliminating sharp bends in the hose.
Features an innovative Diver Changeable Exhaust system (DCE). The system gives the diver the ability to change from a small exhaust tee to a large exhaust tee. This gives the user a choice, wider exhaust tee for minimal bubble interference (essential for underwater photography) and narrow exhaust tee for a smaller compact comfortable regulator. Only the narrow exhaust tee is supplied with the regulator.
Optional 5th port is available for sidemount or twin cylinder set ups.
Can be converted from a right-handed hose configuration to a left handed configuration. The process of changing the regulator to a left-handed configuration is both quick and simple. However, this procedure must ONLY be performed by an APEKS Authorised Service Technician.
Available in yoke or DIN configuration.
Braided flexi-hoses are now standard on all models. These hoses are lighter weight, more flexible and more durable.
Suitable for coldwater use (below 10 C / 50 F).
Compatible with EAN40 out of the box.

Regulator Apeks XTX40

First Stage:
  • Use the DST first stage.
  • Unique over-balanced, diaphragm design - as the diver descends, the over-balancing feature allows the medium pressure gas in the hose to increase at a rate faster than ambient. This results in superior performance at depth.
  • 2 HP ports and 4 MP ports on a rotating turret are angled for optimum hose routing.
  • An environmental dry system keeps water out of the main spring chamber thus preventing ice buildup and keeping silt and contamination out.


Regulator Apeks XTX40

Second Stage
  • Pneumatically-balanced second stage results in smooth, easy breathing.
  • The XTX purge buttons are large and easy to operate. A 2-stage progressive purge is used - press the purge on the side for a lower flow rate, useful where more control is required such as filling lift bags etc, then press in the centre for the full effect of the purge, i.e. when regulator clearing etc.
  • The large venturi lever has a soft touch rubber grip, which makes it easier to locate and use. The lever reduces the amount of grit ingress and therefore resists any possible friction giving a smooth operation.
  • Easy-to-grip opening effort control knob keeps the diver in control.
  • The second stage is manufactured with active protection against infection as all molded parts are produced with an additive that kills MRSA, protects against E-Coli, bacteria and fungi, and is also very effective against viruses, mould, yeast and algae.
  • A silicone exhaust valve improves the breathing performance of the regulator.
  • The Comfo-bite™ mouthpiece virtually eliminates jaw-fatigue.
  • A heat exchanger (patented) which surrounds the valve mechanism, dissipates the cold caused by gas expansion while drawing in the warmth of the ambient water


Cek harganya di sini atau sini gan.. 

Bubblemakerscuba.com


Rabu, 15 November 2017

Regulator Apeks XTX20, spesialis air hangat.


Regulator Apeks XTX20. Bubblemakerscuba.com  Regulator Apeks XTX20. Bubblemakerscuba.com


This regulator has the performance of the XTX40 but without the cold water features. It is well suited for warm water conditions (above above 10º C / 50º F) and is exceptional value for money.


Designed for water above 10º C / 50º F
Features an innovative Diver Changeable Exhaust system (DCE). This system gives the diver the ability to change from a small exhaust tee to a large exhaust tee. This gives the user a choice, wider exhaust tee for minimal bubble interference (essential for underwater photography) and narrow exhaust tee for a smaller compact comfortable regulator. Only the narrow exhaust tee is supplied with the regulator.
The second stage can be converted from a right-handed hose configuration to a left-handed configuration. The process of changing the regulator to a left-handed configuration is both quick and simple. However, this procedure must ONLY be performed by an APEKS Authorised Service Technician.
Available in yoke or DIN configuration.
Braided flexi-hoses are now standard on all models. These hoses are lighter weight, more flexible and more durable.
Compatible with EAN40 out of the box.

First Stage:

  • Use the UST first stage.
  • A balanced, diaphragm design – provides consistent easy breathing from start of dive until end.
  • 1 HP port and 4 MP ports are angled for optimum hose routing

Second Stage

  • Pneumatically-balanced second stage results in smooth, easy breathing.
  • The XTX purge buttons are large and easy to operate. A 2-stage progressive purge is used. Press the purge on the side for a lower flow rate, useful where more control is required such as filling lift bags etc, then press in the center for the full effect of the purge, i.e. when regulator clearing etc.
  • The large venturi lever has a soft touch rubber grip, which makes it easier to locate and use. The lever reduces the amount of grit ingress and therefore resists any possible friction giving a smooth operation.
  • The 2nd stage is manufactured with active protection against infection as all molded parts are produced with an additive that kills MRSA, protects against E-Coli, bacteria and fungi, and is also very effective against viruses, mould, yeast and algae.
  • A silicone exhaust valve improves the breathing performance of the regulator.
  • The Comfo-bite™ mouthpiece virtually eliminates jaw-fatigue.

ConnectionsYoke and DIN available
Type of first stageBalanced diaphragm design
Body TypeCylindrical without rotating turret (US4 type)
Number of HP ports1 (7/16" UNF)
Number of MP ports4 (3/8" UNF)
First stage exteriorChrome over marine brass
OrientationConvertible LH or RH
Coldwater UseNo - designed for waters warmer than 50º F (10º C)
Type of second stagePneumatically balanced
Integrated Venturi LeverYes
MouthpieceComfo-bite™
Exhaust teeDiver Changeable - supplied with small exhaust tee only.
Hose typeBraided Flexi-hose
Overall work of breathing (WOB) scoresAvg. 0.85 joules/liter
Nitrox compatibleYes to 40% O2 when new, out of the box / Can be O2 cleaned to 100%.
WeightYoke 1186g / DIN 1056g


Regulator oke, cek sini atau sini untuk best pricenya..


Selasa, 14 November 2017

Regulator Apeks AT20, Balanced

The AT20 is the predecessor to the XTX20. 


Regulator Apeks AT 20. bubblemakerscuba.com


Regulator Apeks yang ekonomis, karena spesifikasi teknisnya sudah balanced tapi minus fitur untuk menyelam di daerah dingin. Buat kita yang di Indonesia, oke banget nih.

Apeks brought it back to the Apeks line up because it represents an excellent value. This is an ideal entry-level regulator that can spoil divers in a hurry. (http://www.apeksdiving.com/us/products/diving-regulators/product/at20.html) -

This high-performance regulator boasts an balanced first stage coupled with a pneumatically balanced second stage.
 - The smooth, quiet breath is sure to enhance your diving enjoyment.
 - Designed for water temps above 50°F / 10°C - The Comfo-bite™ mouthpiece, with its patented bridge virtually eliminates jaw-fatigue
 - Compatible with EAN40 out of the box.

First Stage:
- The first stage is a balanced diaphragm type that offers consistent performance from start of dive until end of dive, regardless of depth.
- 1 HP port and 4 MP ports are available
- Available in yoke only

Second Stage:
- Pneumatically-balanced second stage results in smooth, easy breathing
- The large purge button on the AT20 is easy to operate even with thick gloves.
- The integrated venturi control provides a performance boost at depth while preventing unwanted freeflow at the surface.
- An extremely efficient exhaust valve improves the breathing performance of the regulator
- The Comfo-bite™ mouthpiece virtually eliminates jaw-fatigue Offers a compact, integrated exhaust tee.

Regulator Apeks AT20


Kalau berminat, cek sini atau sini dulu harga dan stoknya, siapa tau jodoh :-)


Rabu, 10 Juni 2015

Harga Promo....Fins X-Shot dan Shot FX, hanya sampai akhir Juni 2015.


Naaa kalau ini buat yang belum punya fin canggih atau yang udah mau ganti fin lamanya yang rusak, atau yang mau kasih hadiah pacarnya... ini ada paket promo untuk pembelian fins X-Shot atau Shot FX asli merek paling top untuk olahraga air, Aqualung...!! Ayo segera kontak nomor terlampir sebelum kehabisan, hanya sampai akhir Juni 2015 saja.

Bubblemakers Paket promo fin X-Shot


Harga Promo.... Beli mask berhadiah snorkel, hanya sampai akhir Juni 2015..


Buat yang belum punya mask selam dan snorkelnya atau yang udah mau ganti mask lamanya yang rusak, atau yang mau kasih hadiah pacarnya... ini ada paket promo untuk pembelian mask, dapat snorkel, asli merek paling top untuk olahraga air, Aqualung...!! Ayo segera kontak nomor terlampir sebelum kehabisan, hanya sampai akhir Juni 2015 saja.

Bubblemakers Paket Promo Mask dan Fin

Rabu, 05 November 2014

Divecomp Suunto Tidak 'ON' Saat Memasang Transmitter

Pernah nggak kalian para pengguna divecomp Suunto pada saat memasang transmitter kemudian keran udara tangki dibuka, ternyata - lho kok - penunjuk tekanan tangki tidak muncul di layar divecomp?

Kasus ini kadang terjadi pada pengguna divecomp Suunto yang menggunakan transmitter saat menyelam, seperti Suunto D4i, D6i, D9tx, dan Dx

Suunto D4i D6i, D9tx, Dx


Fungsi Transmitter 
Transmitter Suunto
Fungsi transmitter ya untuk men-'transmit' atau mengirimkan data yang diperoleh ke receiver/penerima yang ada di divecomp yang dipakai penyelam. Data apa yang diperoleh transmitter? data berapa sisa udara yang berada dalam tangki. Itu berarti juga fungsi transmitter menggantikan fungsi selang udara penghubung antara 1st-stage pada tangki dengan submersible pressure-gauge (SPG), sehingga tidak perlu repot terbelit selang konsol (console).

Supaya koneksi tersebut berhasil dengan baik, syaratnya adalah divecomp dan transmitter harus dipasangkan dengan kode angka unik tertentu. Pada setting di divecomp hal itu disebut 'pairing'. Kode angka unik tersebut untuk memastikan supaya tidak ada sinyal yang bentrok bila di dekat situ ada pengguna transmitter Suunto yang lain. Untuk mengaktifkannya, lakukan langkah berikut:

  1. Masuk ke menu 'Tank Press Pairing' di divecomp. 
  2. Masuk menu 'Dive Mode', cari menu  'Tank Press Pairing'. Lihat Petunjuk Manual masing-masing jenis divecomp untuk detilnya.
  3. Pastikan settingnya ON, bukan OFF.
  4. Kembali ke menu utama 'Dive Mode'
  5. Pasang transmitter di lubang High Pressure (HP) di 1st stage yang sudah terpasang pada tangki.
  6. Buka keran (valve) udara tangki.
  7. Transmitter akan aktif bila isi tangki lebih besar dari 15 bar. Begitu keran dibuka, transmitter akan mengirim data dan kode angka pairing. Bila divecomp tidak mendapatkan kode angka pairing tersebut, pada bagian kiri bawah layar akan tampil “cd:--”. Simbol petir tidak muncul di kiri bawah layar. Solusinya: dekatkan divecomp ke transmitter, tunggu beberapa saat sampai sinyal mulai diterima dan simbol petir muncul.
Bagaimana kode pairing tersebut terbentuk?
Kita tidak dapat memilih kodenya secara manual, kode akan dibuat oleh transmitter secara otomatis. Kita hanya dapat menghapus (clear) kode pairing yang dibuat transmitter, kemudian men-setting ulang sehingga transmitter dipaksa untuk membuat kode pairing yang baru.

Kenapa output transmitter tidak muncul di layar divecomp? 
Ini karena sinyal transmitter yang diperoleh divecomp bentrok dengan sinyal dari transmitter lain, kemungkinan terjadi karena ada beberapa transmitter yang aktif juga. Hubungan antara transmitter dan divecomp hanya dapat terjadi bila terjadi 'pairing'.

Oke, jadi bagaimana solusinya kalau terjadi bentrok kode seperti itu? 

1. Lakukan ulang proses pairing
  • Buka keran udara tangki pelan-pelan hingga terbuka penuh.
  • Lalu tutup keran cepat-cepat sampai tidak ada lagi udara keluar dari tangki, dan buang sisa udara di selang dengan menekan 'purge' pada regulator. Akibatnya tekanan turun hingga kurang dari 10 bar atau bahkan nol. Tunggu sekitar 10 detik, lalu buka lagi keran udara tangki sampai terbuka penuh. Transmitter akan memberi kode angka pairing yang baru secara otomatis.
Kalau cara nomor 1 masih gagal, lakukan cara ke 2.
2. Hapus kode angka pairing
  • Masuk menu 'Dive Mode'
  • Masuk menu 'Tank Press Pairing'
Suunto Tank Press Pairing

  • Ubah Statusnya menjadi 'Clear' 
 Suunto Tank Press Clear

  • Kembali ke menu Dive Mode, untuk menyimpan (Save).
  • Lakukan proses nomor 1 kembali

Coba lihat juga film berikut:


Sabtu, 01 November 2014